Monday, January 23, 2006

Sneak preview

Although I was hoping the organ be completely finished there are still a few little jobs to do.

Unfortunately the Electro is too tight a fit in the cabinet so getting it in and out is a hassle and I'm concerned it will get stuck if the wood contracts :)

The two alternatives are to make the inside of the cabinet wider or decrease the width of the Electro. I'm inclined towards the second option! Stay tuned :D


Sunday, January 15, 2006

Assembly complete!

Now I've attached the top panel and side cheeks, assembly is complete and everything is looking hunky-dory. The only remaining jobs are to sand it down, get rid of the rough edges and then stain and varnish it.

I'm also considering if I should mount a music stand to the top panel and adding a Hammond-Leslie style "half-moon" switch to the front to control the rotary simulation speed, that would really be the icing on the cake! Any comments?

The toughest part of the build was to cut the inset on the top panel with the jigsaw. That tool seemed to have a mind of its own and wandered off course by at least 5mm. That mistake took me an hour of sanding to put right...


Friday, January 13, 2006

Construction begins

The first pieces to join were the front lip and the back panel. Luckily I was able to borrow some huge clamps to hold it all together whilst the glue dries.

Then I attached the supports for the Electro. No problems at all so far with the dowelling, if you take your time it's pretty straightforward. It really helps if you have dowel centres to help mark where to drill the holes.

Next job is to cut the shape of the top and side panels. Trouble is I have to find someone who can lend me a jigsaw first...

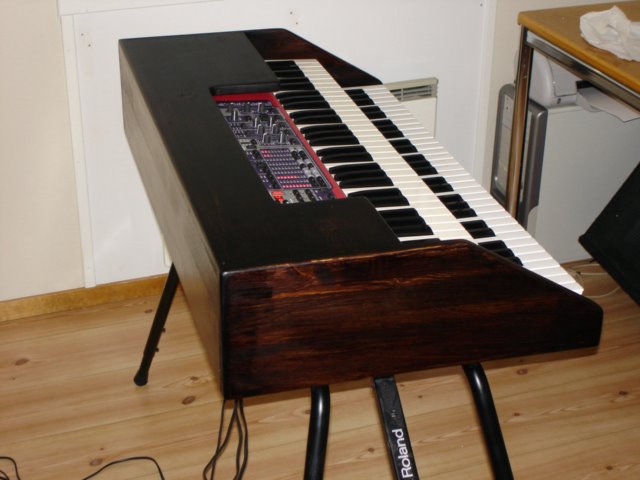
Also note the holes for the cables. The large hole on the right is to access the power switch on the Electro! I might also cut some holes or slots into the base to use as handles.


Saturday, January 07, 2006

The plans

Well, now that the lower manual is in its final resting place I can mock up the position of the Electro and then make some measurements before ordering the wood for the cabinet. Photos of my "plans" are attached. The second diagram shows how to cut the 18 x 400 x 2400mm board.

I'm planning on joining the cabinet with dowels. Never done this before but I have borrowed some tools and it doesn't seem to be too complicated. This will be next weekends project...

A few words on the motherboard. It's working for now anyway. It seems that as soon as I attach it to the base it stops working but when it's loose then it's ok. Just as well since Studiologic never replied to my emails. I have arranged to buy another second hand one for spares.

Lower manual done!

At last some progress to report after a couple of weeks away from home!

The lower manual is now very securely and neatly attached to the base. I used the base of the Fatar as a template. By banging in a large nail through each hole I had a clear mark where to drill. I used a fancy jig to ensure that the hole was vertical although it probably didn't really make much difference in all honesty.

The end result is brilliant and I am pleased with the feel of the lower manual now that it is in place.